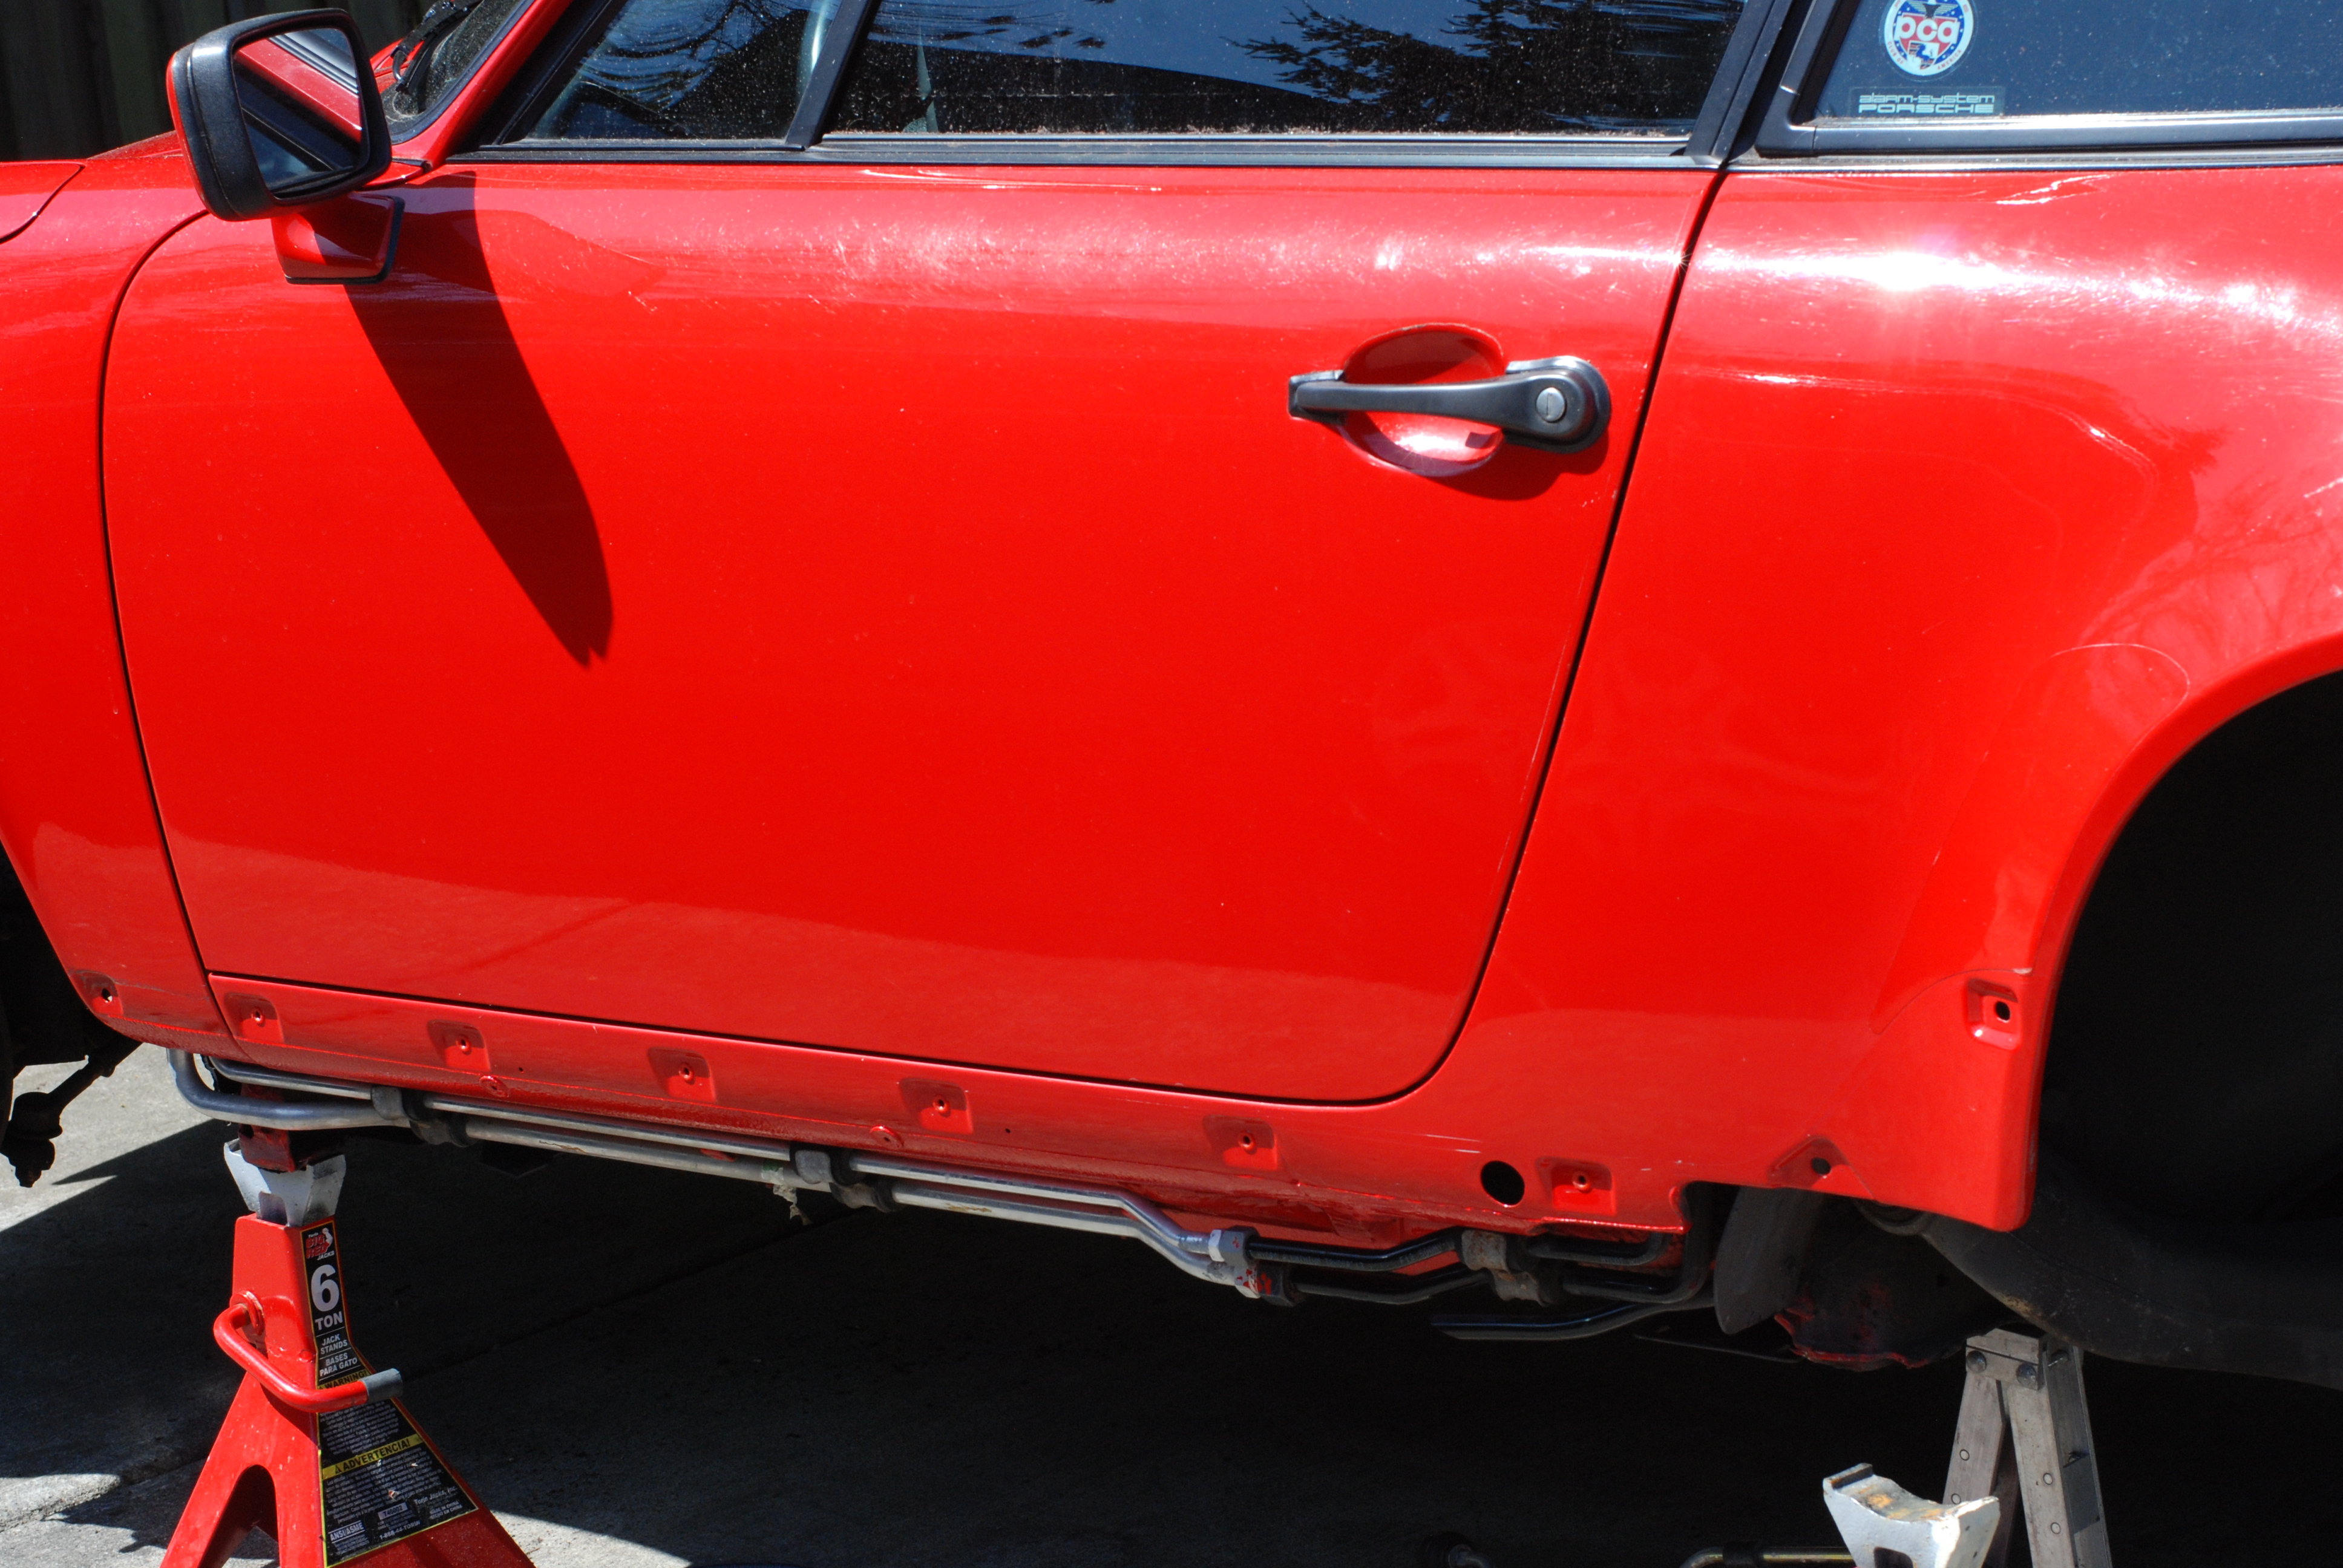
Larouex BB King 的个人资料These Blues is Killing M...照片日志列表 工具 帮助

日志


11月14日

Porsche 914 EV Project – November 2009 - #32

The engine is now dropped outta the car and I have removed the gas tank for restoration. I installed new stainless steel gas lines and cleaned up a lot of gunk. I then started into the famous “hell hole” rust present in all un-restored Porsche 914’s. This phase of the project can strike sheer terror into your heart when you dig in; mainly due to the discovery that you have a “parts car” or a decent one based on the damage in this area. The goodness is that this car has minimal rust in the longitude. That said, it is still significant work and requires fabrication and welding. I cut out the rusty bits to inspect the longitude and see how much good metal I have to work with, what you are trying to do is preserve lips and shelf's for attaching metal and get to the bright, shiny metal to weld onto. So far, we are still inspecting and figuring out the shapes of metal we want to weld. I am going to treat the inner longitude with POR-15 as I tested the metal and it is all strong and in good shape, there is surface rust and so encapsulating it is a decent fix for the time. Some day in future I would do a repair in this area to fully restore it, but it is more than good enough and will stop any further deterioration. I have a lower, rear inner longitude and so I am going to cut and fit that and see if I can get welded in for a good fit. It is thick metal and will provide some nice strength.

In the pictures below, you can see the cigar shaped hole in the top of the longitude…

 DSC_0011 DSC_0014

Then I cleaned it up and I am scrubbing metal, sanding, grinding, etc.

DSC_0017 DSC_0018 DSC_0016

Battery tray removal and new parts…

DSC_0010 DSC_0009

11月2日

Porsche 914 EV Project – November 2009 - #31

Okay, this is more geared towards the “gas” version of one of my 914’s, but it is cool and it helps me clear the garage for the next phase of the EV restoration. I have purchased a tricked out Porsche engine with 100% working EFI system, a newly rebuilt transmission from my trip with Dr. Evil and the crew and a new SS Borla Exhaust (very rare) and I plan to put this into the yellow Porsche over the next couple weeks. Finally, it will be better than new, more powerful and more important, dependable (fingers crossed!)

The exhaust is a work of art…

DSC_0001 DSC_0002 DSC_0003

I then had my son and his buddy put up my outside shelter, wired it for lights and power and turned it on tonight!

DSC_0004  DSC_0008 DSC_0007

DSC_0005 DSC_0006

9月13日

Porsche 914 EV Project – September 2009 - #30

Well back to the Porsche EV and Restoration Project! I took the summer off to restore the tent trailer and having finished that, it is time to get back to the Porsche. I have half of the garage cleaned & organized and now plan to jump in next weekend and finish up the rear panel welding. In the meantime, I had to make sure I had a solid and reasonably perfect transmission to mate up to my Warp 9 Electric Motor. This weekend I went to southwest Washington (Battle Ground) and took a transmission rebuilding clinic with 13 others (and some observers throwing around non-PC jokes of all kinds) and finished my transmission. I now understand the basics of how to approach fixing a transmission and I have my super clean “901 side shifter” ready to go.

In pieces…

DSC_0354 DSC_0355 DSC_0356

Back together…

DSC_0361 DSC_0360

4月16日

Porsche 914 EV Project – April 2009 - #29

Okay this is off topic, but I wanted to show how I planned to haul my EV when I needed to take it to a show or pull it home. Early, early this morning I had to drop my yellow Porsche off at the shop in Seattle, so I needed to haul the car about 22 miles. I feel bad that I humiliated the poor car, but lots of folks honked and gave the thumbs up. people really like 914’s and yellow one even more.

DSC_0744 DSC_0745 DSC_0746

3月5日

Porsche 914 EV Project – March 2009 - #28

After I finished up the door sill, I decided to hang the door and tackle the following…

  • Weld in new steel and cover the door handle insets. The car will have “shaved doors” and will be opened with a remote. This give the side of the car a long, clean line. You can see the roughed-in delete on the door handle in the picture.
  • Install the 911 Power Window Assembly.
  • Wire up the actuator and solenoids for the lock, door opening and window (up and down).
  • Install a modern door clasp to replace the stock 914 door clasps. The problem is that the 914 door latch moves sideways and I needed to open it from a “downward pull” of the solenoid. The inside area to “play in” in a 914 door is very limited. The mounting will require fitting, alignment and welding.
  • Line up the rear quarter panel and get it fitted.

I will document the shaved door installation and power windows in later posts.

The side view shows the car with the pieces hung and it is starting to look like a Porsche again, albeit an ugly one!

DSC_0687

2月16日

Passenger Side Restore and Repair Costs

I wanted to show the costs associated with fixing the Passenger side rustoration...
 
2月15日

Porsche 914 EV Project – February 2009 - #27

Great progress on the passenger side and have completed…

  • The boxing of the bottom of the door pillar. Kid of a PITA to make this part and get everything aligned.
  • Tacked in the door sill.
  • Mounted the “safer” door from the ‘74 parts car.

DSC_0678 DSC_0677 DSC_0675

I am going to focus on some door fabrication activities next. I need to enjoy the heavy metal work being done on this side and do something a little less taxing. I plan to mount in the 911 power window assemblies and the shaved door kits. This is the best time as I have to move holes, cut things, etc. Then I will work on the considerable work to mount the rear quarter panel.

And BTW, I received my forged aluminum Fuch’s and they are from an original 914/6 which is nice. I plan to strip them, clean then and then prepare them to be painted on the inside and then polished in the rim areas. Imagine the red wheel below in Irish Green and you get an idea of how cool and matched these will be on the car.

DSC_0680 redwheel

1月4日

Porsche 914 EV Project – January 2009 - #25

I managed to get the Motor mount all cleaned up, added some new metal and welded it in. I am close to finishing up the suspension section  of the project and I did the suspension tie (a thicker piece of metal that connects the outer to the inner consoles). I then moved onto the first half of the inner firewall and added the new metal to the center tunnel to attach the new floor pan when I get to that. Progress is good, but the metal work is taking more time than I wanted and so I am running behind. The good news is that all the pieces are coming together and within tolerances, so I am super happy with the strength of everything and my overly aggressive welding techniques.

DSC_0649 DSC_0650 DSC_0652

DSC_0653 DSC_0655 DSC_0657

12月18日

Porsche 914 EV Project – December 2008 - #24

My posts have been quiet lately, but not because I haven’t been busy on the project. The challenge is that I have some more difficult things to fabricate and make work. I finished up getting the inner console installed, which included fabricating the sheet metal sleeve, welding that in, placing the console in the right place using my jig I made early in the project and doing some fairly complicated welding. Then I started to finish up the fabrication of my tube carrier for the big battery wires that will run on the inside of the inner longitude. I have to fabricate up the ties for the suspension and these tie together the bottom on the suspension consoles so that they are tied together for strength.

DSC_0642 DSC_0641 DSC_0635

DSC_0639 DSC_0640 DSC_0638

DSC_0637 DSC_0636 DSC_0634

12月3日

Porsche 914 EV Project – December 2008 - #23

I finished up positioning my outer wheel-house and having it sit there taunting me for two days was too much for me, so tonight I welded it in. It went in fine, I then added an overlap with the chassis stiffening kit which I have installed rear-ward and finished. I blew a small hole around one of the stupid spot welds I drilled out, so I need to patch that before I am completed. It is really nice to be over this hump!

DSC_0634 DSC_0636 DSC_0635

12月1日

Porsche 914 EV Project – December 2008 - #22

I am ready to do some “critical” positioning and welding. I had to recover the outer trailing arm console as everything around it was rusted, yet once I got it cleaned up, it was in pretty good shape and had a little rust on the inside. I treated that, put POR-15 on that and then welded on a new top part so I could attach the top as the removal of the spot welds weakened the metal. Note to self/others, if you have to recover this part, I would cut it out and then grind down the metal to preserve the ability to put your own plug-weld holes in later.

In order to make sure the part goes in correctly, you need to make sure the part gets back on the car in the same place. I could have saved myself some hassle in making a full jig for the placement of the part, but I did have the sense to measure and triangulate everything to record the placement. The following measurements were taken and validated to put the holes right back where they need to be…


  • Front center of the outer console bolt hole – Exact to intact measurement 138.5 cm
  • Front center of the outer console bolt hole leveled and measured off the firewall, even and exact
  • Template over the wheel well to position outside of outer console seam
  • Triangulated measurement from middle of firewall to side, outside to the center of the outer console bolt hole
  • Pitch of bolt heads for 2 angles on outer console

I now have the part positioned and ready to weld in. A few more days to contemplate and ask the 914 World forum their opinions and feedback. Then we are all done in the outside rear repair. Onto the rocker and jacking post. That is the boy helping weld his first metal parts!

DSC_0635 DSC_0641 DSC_0642

DSC_0643 DSC_0638

11月11日

Porsche 914 EV Project – November 2008 - #21

Today I sealed up the outer longitude and attached the inner rear wheel well. Lots of fitting and I still have the inside to do, but structural integrity is back in the car!

DSC_0688 DSC_0691 DSC_0694

DSC_0695 DSC_0696

11月10日

Porsche 914 EV Project – November 2008 - #20

I have completed the rear and middle inner longitude repairs and I am now moving onto the inner wheel well and outer rocker panels. This is a significant moment for the project. I learned a lot about the characteristics of my MIG welder and how to work with thin sheet metal.

In the fitting below, I did a lap weld and worked the pieces together to merge about a 1/2 inch. I then fitted my inner sleeve and welded that into place.

DSC_0636 DSC_0639 DSC_0687

I then did another inner sleeve for the upper part of the rear longitude, This is total overkill as the fitting on the upper part was very strong, but I wanted to make sure the car is stiff. I then treated the inner area with POR-15 (and primer) before I close it up with the inner wheel well.

DSC_0689 DSC_0690

11月2日

Porsche 914 EV Project – November 2008 - #19

I finally finished up all measurements, had my Clecos in and tested. So we started welding in the longitudes this weekend. Lots of Lap and Plug welds and then cleaning them up nicely. Car is almost back to being structurally sound!

DSC_0613 DSC_0636

 DSC_0634 DSC_0635

10月27日

Porsche 914 EV Project – October 2008 - #18

Recovering parts is something you have to invest time in when restoring and working on cars. Some parts are just not obtainable (this is why you buy a donor car) and others are so phreaking expensive, you cringe. The motor mounts and the outside trailing arms pieces on the 914 are these kinds of parts. You have to recover and fix them or call AA and my last quote was US 650.00 to get used versions. So I took off the motor mount and prepped it up. It needs some Dremel work to get all the rust out and final prep (work for the boy!) and it saved me a bunch of money. It was very detailed work and required a lot of fine grinding and spot weld removal.

DSC_0556 DSC_0557 DSC_0558

Then I made a purchase last week of a 74 914 that literally was out of a barn. It was part of an estate of a man who passed and his wife traded the car to a company for tree work and I picked it up from them. It is one of the most desirable 914’s with a 2.0 FI (all intact) and the brown interior. A little surface rust in some places, but none of the big problems prone to 914’s as it has been in a shed for 14 years. The guy who I bought it from took it to the Porsche shop and got it all running and drivable, but they scared him by saying the car should be converted to Weber Carbs for a grand or so. So he panicked a bit and decided to sell. Of course the Fuel Injection on a 2.0 was awesome and very economical, you can get 35-40 MPG out of these cars when you get them tuned and working right. Most Porsche mechanics don’t like to work on a 40 year old FI design and so conversion to dual Weber Carbs is pretty typical on these cars and it destroys their originality and value IMO. I contacted him directly after seeing it listed on EBay and paid for it there on the spot and covered his EBay fees. I won’t say what I got this for, but it was roughly 1/2 it’s value after some TLC. Mileage is @ 38K on the speedometer and we really can’t tell if it did a full turn as the car has all original stuff on it, so once when I get into more engine work via the inspection plate and reviving the FI, I will report back on what I really think the mileage is.

DSC_0565 DSC_0566 DSC_0567

Because I am going to leave this car all original (to preserve the value) I am recovering parts from the other 74 like the Rivera mags and Monza muffler, etc. I will post pictures as I update things.

DSC_0563 DSC_0564

10月26日

Porsche 914 EV Project – October 2008 - #17

This weekend we turned the corner and start actually adding to the car restoration versus just pulling rusty stuff off. This is a critical time as you have to get fittings in place for the longitude members and get all the measurements back within tolerances. I did a lot of detailed metal shaping and fitting so I could get the Clecos all in an tightened up to prepare for the welding. I measured everything and checked all tolerances from my original notes. I am going to take a couple more days to measure and check alignments and then begin the welding of the pieces into final placement. Wohoo!

DSC_0563 DSC_0564 DSC_0565

DSC_0566 DSC_0567

10月18日

Porsche 914 EV Project – October 2008 - #16

Sometimes things go your way completely unintended. When I first bought the two 914’s, I thought that the sunflower 74 was the better car. Sure it had been sitting for a while and had rusty wheel bearings, pretty typical for being in the elements for 10 years. But something stopped me and I chose the Blue 72 car to do the first conversion on. The blue car had more rust and a longitude replacement was required (which really complicated the project) but my thinking was do the hard one first and the 74 will be easy. What I have come to discover is that the 72 is a really solid car and the 74 is a piece of SH%$%! The PO was a bit of a scammer and I was not versed enough in the details to pick up on some of the issues. But I will come back to that.

In the meantime I have managed to remove all rusty pieces from the passenger side of the car and place in the new metal for the longitude front and back. We did make a mistake and cut the rear longitude too short and I have been awaiting a replacement from AA for 2 weeks (c’mon!).

DSC_0555 DSC_0557 DSC_0559

DSC_0561 DSC_0563 DSC_0565

So with all that in flight and the 74 being crappy, I quickly sacrificed the bugger for a parts car and have been removing the fenders and parts for placement on the 72. Which actually works great as I get to coordinate the part removal and make sure the easiest path to welding in the replacements.

DSC_0558 DSC_0556 DSC_0555

Removing a fender from a 914 is intensive. It took about 6 hours with a spot welding removal bit and lots of targeted chiseling. But the part is perfect, in great shape and will make the repair on the 72 a lot easier to align on the door. I also noted a rear collision repair on the back as the fender was tacked and welded back incorrectly. Hard to determine the severity of the damage originally, but it looks like a fix to the rear versus the fenders. The real “scam” is that the PO said the battery was moved to the trunk long ago (true) and the was rust free (false) and looking closer, you can see a pretty poor repair in that area. We will compare it to my work in a few weeks.

DSC_0557

9月21日

Porsche 914 EV Project – September 2008 - #15

I have been planning for a number of weeks the modifications I would make to the 914 engine compartment and gas compartments when it comes time to fabricate up the battery boxes and supports. My goal was to get a reasonable weight distribution to the center of the car and preserve a little of that mid engine magic the 914 is know for. Here is my engine compartment layout. I measured this up this weekend and in between my major repairs, I will start making a mock up for fitting purposes and sizing.

Porsche 914 Engine Compartment Battery Layout AGP 31

Porsche 914 EV Project – September 2008 - #14

Doing a large project whether it be for your job or yourself has that special moment of satisfaction, that reward you work for not connected to “just money” or a paycheck. Everyone has a different point and personal response to these moments as I have discovered over the years leading teams on large software projects… and trying to hold together all the people it takes to finish something up. Personally, I love the moment when all the work is known and the ambiguity is at a minimum. All that is left is the process, finding and assigning the right people, resources and guiding the outcome. It is the moment when I know something will be successful and that it is possible. I am now at that phase on the passenger side of the Porsche. I have removed the outer rockers and inner fender and all the excess rusted metal. I am fabricating the strengthening parts for the double-walled portions of the inner longitude and have all my measurements and plans organized. It has been interesting getting to this point and I thank the connections the internet creates and the enthusiast forums which provided me with incalculable knowledge and documentation.

I also believe strongly that you should never tackle anything without the proper tools and I have invested in a complete welding setup, a fully stocked toolbox, a restoration rotisserie, unibody measurement tools and the Led Zeppelin box set. In preparing for the replacement of the inner longitude and rear suspension, the whole car will lose all structural integrity and you have to have it supported safely and know how to bring the new parts into spec. Otherwise, you have what is called a “highway bomb” which will break under stress. The 914 was prone to this without proper repair anyway because of the stupid engineering decision to place a lead cell battery over the passenger suspension components and it rusted straight down with extreme determination. The next affect was to take that rust and goop all the way down the inner longitude and ruin that part and the rockers. This is one reason that restoring a 914 is important and yet never worth the investment, they just are not worth the return. In my case I am happy to get in and repair these parts and I want a solid roller for my EV conversion and I like knowing all is well.

So let’s look at the exposed inner longitude after much effort I gave it cutting, grinding and the metal removal…

DSC_0546 DSC_0545 DSC_0505

The other key thing is to take that extra time and document the measurements of the car. The funny thing is that a 914 body delivered from the Karmann factory was allowed deviations of 7mm to 9mm in the car. This is huge by today’s standards and that means that your roller maybe off that much compared to factory specs. Luckily mine is in pretty good shape. I measured everything up, fabricated a couple measurement shims for when I weld in the new parts to the final positions and matched up to the factory specs.

DSC_0501 DSC_0499 DSC_0495

DSC_0500 DSC_0503

The last task of the weekend was to start to fabricate all of the pieces for double-walling the parts I am replacing. This is a PITA, but part of the fun of the repair too, you get to make parts from your own hands and skills and plan how they will fit. Sound creative enough for ya?

DSC_0547 DSC_0548 DSC_0550

9月13日

Porsche 914 EV Project – September 2008 - #13

Finally things are picking up. I received 1/2 of my sheet metal order on Friday and started to plan out the repair of the inner longitude and outer rockers. Automobile Atlanta supplied the sheet metal and the parts look really well done. I also picked up my MIG gas canister for my welding unit and we started up the cart today. Laid down some of my first welding beads since 1982 and did pretty well! I am in Boston next week and when I return I will do a lot of sheet metal practice and plug welding. I started to prepare to remove the main rear suspension bracket (that cannot be ordered and it looks savable). Before I go any further, I am awaiting my bottle jacks and plan to level out the car and build a complete suspension jig for the rear of the car before I tear out any parts. This will allow me to get everything back in place and true. Most important was I picked up my WarP 9 EV motor this morning from Carlos @ EV-Supply and saved myself some shipping costs. 

DSC_0491 DSC_0487

DSC_0488 DSC_0493 

DSC_0489